This device has been tested and found to comply with the limits for a Class B digital device, pursuant to Part 15 of the FCC rules. These limits are designed to provide reasonable protection against harmful interference in an ofce installation. This equipment generates, uses, and can radiate radio frequency energy and, if not installed and used in accordance with the instructions in the user manual, may cause harmful interference to radio or television reception. However, there is no guarantee that interference will not occur in a particular installation. If this equipment does cause interference to radio or television reception, which can be determined by turning the equipment off and on, the user is encouraged to try to correct the interference by one or more of the following measures:
• Reorient or relocate the receiving antenna. • Increase the separation between the equipment and receiver.• Connect the equipment to an outlet on a different circuit from that to which the receiver is connected.
• Consult Accutome Ultrasound, Inc. or an experienced radio/TV technician for help.This device complies with Part 15 of the FCC Rules. Operation of this product is subject to the following two conditions: (1) this device may not cause harmful interference, and (2) this device must accept any interference received, including interference that may cause undesired operation.
CAUTION: Changes or modifications not expressly approved by Accutome Ultrasound, Inc. could void the FCC compliance and negate your authority to operate the product.
Authorized Representative in Europe (for regulatory affairs only): The A-Scan Plus Connect is Manufactured by: Accutome, Inc. 3222 Phoenixville Pike Malvern, PA 19355 USA Toll Free (USA): 1-800-979-2020 International: 610-889-0200 Fax: 610-889-3233 www.accutome.com • (800) 979.2020 US & CA • (610) 889.0200 International • +31 (0) 485.350300 Europe
Safety Issues to Consider When Using the Accutome A-Scan Plus Connect 5 Indications for use 5 Side Effects 5 Contraindications 5
Symbol Definitions for the Accutome A-Scan Plus Connect 6 Disinfection and Cleaning 6 Safety Precautions 6 Cleaning Procedure at Point of Use 7 Disinfection of the Probes with Alcohol 7 High- Level Disinfection of the Probe 7 Electrical Hazard and Safety 7 Avoiding Equipment Damage 8
Avoiding Electromagnetic and Other Interference 8 Chapter 3: Getting Started 9 Assembling the Accutome A-Scan Plus Connect 9 What you Need 9 Personal Computer Specifications 10 A-Scan Plus Connect Control Unit 10A-Scan Plus Connect 10MHz Composite A-Probe 10 USB Foot Switch 10 A-B Type USB Cable (Control Unit to Computer) 10 Printer 10
Accutome A-Scan Plus Connect Software 10 Assembling the A-Scan Plus Connect 11 Connecting the Probe 11 Probe Setup 12Accutome Ultrasonic Probe Kit (PN 24-4001) 12 Accutome Probe with Goldman Tonometer Adapter 13 Accutome Probe with Handle Extension 13
Connecting the A-Scan Plus Connect to the Computer 14 (800) 979.2020 US & CA • (610) 889.0200 International • +31 (0) 485.350300 Europe • www.accutome.com
Adjusting the Gain 40 Import /Export 41 Snapshots/ Reports 41 Facilities 45 Physicians 48 Users 49 Eye Types 51 Personalizing IOL Overview 58
Manual Entry of Personalization Information 62Overview 62 Selecting IOL Group and Lens 62 Manual Entry of a Patient Record to be Personalized 63 Updating IOL Constant 64
Deleting Postoperative Results 64Deleting Current Postoperative Result 64 Deleting All Postoperative Results 65 Save and Conrm Conguration Changes 65
Chapter 6: Entering Patient Information 66 Overview 66 Exam Tab 66 New A-scan Study 66 Control Unit Info 68 Study Info 68 www.accutome.com • (800) 979.2020 US & CA • (610) 889.0200 International • +31 (0) 485.350300 Europe
Eye Type 75 Capture Method 76 Display Range 76 Gain 76 OD/OS 76 Rescan/Stop 76 Auto/Manual Capture 76 Auto Mode 77 Auto Restart 77 Using the Footswitch 77 Measurement Icons 78 How to Print a Record 78
Moving Gates 79 Overview 79 Available Gates/Threshold 80 Edit Gates of all Scan 81 Reset Gates 81 Chapter 8: Performing Calculations 82 Overview 82 Calculating the Lens 82 Calculation after Corneal Refractive Surgery 82 IOL Calculation Tab 82Overview 82 Manage IOL Groups 84 Select IOL Groups 88 Selecting Formula 88 Changing the AXL Value 88 Entering K1 and K2 Values 89
Rx Surgery 90 Overview 90 (800) 979.2020 US & CA • (610) 889.0200 International • +31 (0) 485.350300 Europe • www.accutome.com
Double K Method 91 Determining Corneal Power after Refractive Surgery 91 Post Rx Surg IOL Calculation Steps 91 Clinical History Method 92 Contact Lens Method 93 Shammas Clinical Method 93 Calculation Results 93 Formula Compare Feature 94 OD/OS 94 Printing Records 94
Chapter 9: Synergy Mode 95 Introduction 95 How to turn on Synergy mode 95 Network Folder or USB Disk Mode 96 IOLMaster 500 version 7.7 96 Chapter 10: Maintenance 100 General Maintenance 100Safety Inspection 100 Visual Inspection 100 Ultrasound Inspection 100 Calibration of Accutome A-Scan Plus 100
Chapter 11: Specifications 101Overview 101 Physical Specifications 101 Environmental Specifications 102 Measurement Accuracy 102 Computer Specification 102 Operating Modes 103 Formula References 104 Storage/Range Specifications 104 Acoustic Output 106 EMC Compliance Information 106
Chapter 12: Warranty and Repairs 109 Warranty 109 Product Returns 109 Service and Repair 109 All Other Returns 109 Non-returnable Merchandise 109 Replacement Parts 110 Documentation 110 Appendix 111 www.accutome.com • (800) 979.2020 US & CA • (610) 889.0200 International • +31 (0) 485.350300 Europe
Figure 1.1 - Accutome A-Scan Plus Connect 1 Table 3.1 - Personal Computer Specications 10 Figure 3.1 - Control Unit and Probe Connector (Right Side of Instrument) 11 Figure 3.3 - Accutome Ultrasonic Probe Kit (PN 24-4001) 12 Figure 3.2 - Probe Connected 12 Figure 3.4 - Accutome Probe 12 Figure 3.6 - Probe with Goldman Tonometer Adapter 13 Figure 3.7 - Inserting the Probe into the Handle Extension 13 Figure 3.5 - Probe Setup with Immersion Shell 13 Figure 3.8 - Probe with Handle Extension and Insertion Tool 14 Figure 3.9 - Probe with Handle Extension 14 Figure 3.10 - A-Scan Plus Connect Control Unit Connect to a Laptop via USB Cable 14 Figure 3.10 - Accutome A-Scan Plus Connect Desktop Shortcut 15 Figure 3.11 - Main Screen Starting New Exam 16 Figure 3.12 - New A-scan Study Screen 16 Figure 3.13 - Entering New Patient Information 17 Figure 3.14 - Selection Facility 17 Figure 3.15 - Selection Physician. 18 Figure 3.16 - Selecting Operator 18 Figure 3.17 - Click Done Creating a New Exam 19 Figure 3.18 - Measurement Screen 19 Figure 3.21 - Measurement Screen Shown 20 Figure 3.19 - Measuring Test Block 20 Figure 3.22 - Measurement Done 21 Figure 3.23 - IOL Calculation Screen 22 Figure 3.24 - K1, K2 Values 23 Figure 3.25 - Calculation Complete 23 Figure 3.26 - Saving a Report 24 Figure 3.27 - Click Yes to Save 24 Figure 4.1 - A-Scan Plus Connect Exams Screen 25 Figure 4.2 - Measure Screen 26 Figure 4.3 - IOL Calculation Screen Selected 26 Figure 4.4 - Setup Screen Selected 27 Figure 5.2 - Select Setup Tab 28 Figure 5.1 - Desktop Icon 28 Figure 5.3 - Setup Tab Opened 29 Figure 5.4 - Option Screen 29 Figure 5.5 - Selecting Main Exam Folder 30 Figure 5.6 - Browse For Folder 30 Figure 5.7 - Selecting Save Changes 31 Figure 5.8 - Are You Sure 31 Figure 5.9 - User Select, Default Folder of Version 4.0 32 Figure 5.10 - Windows Browser - Locate Exam Folder 32
(800) 979.2020 US & CA • (610) 889.0200 International • +31 (0) 485.350300 Europe • www.accutome.com
Figure 5.11 - Net Share 33 Figure 5.12 - Windows Browser - Locate Exam Folder 33 Figure 5.13 - Selecting Exam Name Combinations 34 Table 5.2 - Eye Types 34 Table 5.3 - Lens Materials and Velocities 35 Table 5.4 - Anterior/Vitreous Materials and Velocities 35 Figure 5.14 - Selecting the Default Eye Group 35 Figure 5.15 - Selecting the Default Formula 35 Figure 5.17 - Selecting Default Capture Mode 36 Figure 5.16 - Selecting Default Scan Method 36 Figure 5.18 - Selecting the K Index 38 Figure 5.19 - Selecting Save Changes 39 Figure 5.20 - Are You Sure 40 Figure 5.21 - Gain Adjustment Knob 40 Figure 5.22 - Turn On the Synergy Mode 41 Figure 5.23 - Selecting the Snapshot Format 42 Figure 5.24 - Snapshot Selection Completed 43 Figure 5.25 - Selecting Network Location 43 Figure 5.26 - Activating Export Report 44 Figure 5.27 - Selecting Network Location 45 Figure 5.28 - Successful Read Write Test 45 Figure 5.29 - Selecting “New” Facility 46 Figure 5.30 - Facility Information Being Entered 46 Figure 5.31 - Are You Sure 47 Figure 5.32 - Are You Sure 47 Figure 5-33 Physicians Screen 48 Figure 5.34 - Physician Name Entered 48 Figure 5.37 - Users Screen 49 Figure 5.35 - Are You Sure 49 Figure 5.36 - Are You Sure 49 Figure 5.38 - New User Information 50 Figure 5.39 - Are You Sure 50 Figure 5.40 - Are You Sure 50 Figure 5.42 - Additional Eye Types 51 Figure 5.41 - Are You Sure 51 Figure 5.44 - New Lens Material Window Activated 52 Figure 5.45 - New Lens Material Entered 52 Figure 5.43 - Eye Type Screen 52 Figure 5.46 - Are You Sure 52 Figure 5.48 - New Anterior/Vitreous Material Window Activated 53 Figure 5.47 - Are You Sure You Want to Remove 53 Figure 5.48 - New Anterior/Vitreous Material Window Activated 54 Figure 5.51 - Are You Sure You Want to Remove 54 Figure 5.52 - Are You Sure 54 Figure 5.50 - Are You Sure 54 Figure 5.53 - Creating a New Eye Type 55 Figure 5.54 - New Eye Type Window Opened, New Eye Type Name Entered 55 Figure 5.55 - Selecting Lens Material 55
www.accutome.com • (800) 979.2020 US & CA • (610) 889.0200 International • +31 (0) 485.350300 Europe
Figure 5.56 - Entering Assumed Thickness 55 Figure 5.58 - Selecting the Vitreous Material 56 Figure 5.57 - Selecting the AC Material 56 Figure 5.59 - Are You Sure 56 Figure 5.60 - Create New Eye Type From Existing Eye Type 57 Figure 5.61 - New Eye Type Completed 57 Figure 5.62 - Are You Sure 57 Figure 5.63 - Are You Sure 58 Figure 5.64 - IOL Personalization 59 Figure 5.65 - Selecting IOL Group 59 Figure 5.66 - Selecting Lens to be Personalized 59 Figure 5.67 - Selecting the Formula 59 Figure 5.69 - Power of Lens Entered 60 Figure 5.68 - Files Transferred 60 Figure 5.70 - Power of Lens Entered 61 Figure 5.71 - Multiple Entries Completed 61 Figure 5.72 - Unlock IOL Groups 62 Figure 5.73 - Select Lens 62 Figure 5.74 - Selecting the Formula 62 Figure 5.75 - Select Manual Enter 63 Figure 5.76 - Manual Entry 63 Figure 5.77 - Selecting Save Changes 64 Figure 5.78 - Are You Sure 64 Figure 5.79 - Are You Sure 64 Figure 5.80 - Are You Sure 65 Figure 5.81 - Are You Sure 65 Figure 5.82 - Selecting Save Changes 65 Figure 5.83 - Are You Sure 65 Figure 6.2 - Create New A-scan Exam 66 Figure 6.1 - Selecting New Exam 66 Figure 6.3 - New A-Scan Study Screen 67 Figure 6.4 - Medical Record Number, Date Of Birth, and Gender Fields 68 Figure 6.5 - Control Unit Info 68 Figure 6.6 - Name Field 68 Figure 6.11 - Starting New Exam, Click Done 69 Figure 6.7 - Selecting Facility 69 Figure 6.8 - Selecting Physician 69 Figure 6.9 - Selecting Operator 69 Figure 6.10 - Entering Remark 69 Figure 6.12 - Measuremenr Screen 70 Figure 6.13 - Recalled Patient Record 70 Figure 6.15 - Rescan Are You Sure 71 Figure 6.16 - Exams Tab 71 Figure 6.14 - Select Rescan to Start Measurement 71 Figure 6.17 - Import B-scan Exam 72 Figure 6.18 - List of Saved B-Scans 72 Figure 6.19 - Selecting a Patient Record to Delete 72 Figure 6.20 - Are You Sure 73
(800) 979.2020 US & CA • (610) 889.0200 International • +31 (0) 485.350300 Europe • www.accutome.com
Figure 6.22 - Manage Version 4.0 Section 73 Figure 6.21 - Select Folder Open 73 Figure 7.1 - Measurement Screen 75 Figure 7.2 - Select Eye Type 75 Figure 7.3 - Sclera and Retina Activated 77 Figure 7.4 - Measurement Reports 79 Figure 7.5 - Calculation Reports 79 Figure 7.6 - Gates 80 Figure 7.7 - Reset Gates 81 Figure 8.1 - IOL Calculation Screen 83 Figure 8.2 - IOL Calculation Screen 83 Figure 8.4 - IOL Groups Screen Opened 84 Figure 8.3 - Manage IOL Groups Screen 84 Figure 8.5 - Select New IOL Group 85 Figure 8.6 - New IOL Group Selected 85 Figure 8.7 - Group Name Added 85 Figure 8.8 - Entering the Description of the Lens 85 Figure 8.9 - Entering A-Constant 86 Figure 8.10 - First Lens Entered 86 Figure 8.11 - Lens Group Completed and Locked 87 Figure 8.12 - Selecting Lens Group to be Removed 87 Figure 8.13 - Save Changes 88 Figure 8.14 - Selecting IOL Group 88 Figure 8.15 - Formula Selected 88 Figure 8.16 - K1 and K2, Target Fields 90 Figure 8.17 - Changed Rx Surg Field 92 Figure 8.18 - K-Post Formula Selection Window Open 92 Figure 8.19 - Post Rx on Completion of Contact Lens Method 93 Figure 8.20 - Post Rx on Completion of Shammas Method 93 Figure 8-21 Compare All Featured Turned On 94 Figure 8.22 - Print Icon 94 Figure 9.2 - Import/Export Screen 95 Figure 9.1 - Setup Screen 95 Figure 9-3 Import/Export Screen 97 Figure 9.4 - Export Icon 98 Table 11.1 - Accutome A-Scan Plus Control Unit Physical Specications 101 Table 11-2 Accutome A-Scan Plus Connect Physical Specications 101 Table 11.3 - Environmental Specications 102 Table 11.4 - Measurement Accuracy 102 Table 11.5 - Recommended Computer Specications 103 Table 11.6 - Operating Mode(s) 103 Table 11.7 - Formula References 104 Table 11.8 - Data Specications 104 Table 11.8 - Data Specications (Continued) 105 Table 11.9 - Data Specications 105 Table 11.10 - Acoustic Output Reporting Table for Track 1, Non-Autoscanning Mode 106 Table 11.11 Acoustic Output Reporting Table for Track 1,
www.accutome.com • (800) 979.2020 US & CA • (610) 889.0200 International • +31 (0) 485.350300 Europe
- Electromagnetic Immunity 108 Table 12.1 - Accutome Replacement Parts 110 Table A.1 - A-Scan Plus Connect System Messages 111 Table A.1 - A-Scan Plus Connect System Messages (Continued) 112
(800) 979.2020 US & CA • (610) 889.0200 International • +31 (0) 485.350300 Europe • www.accutome.com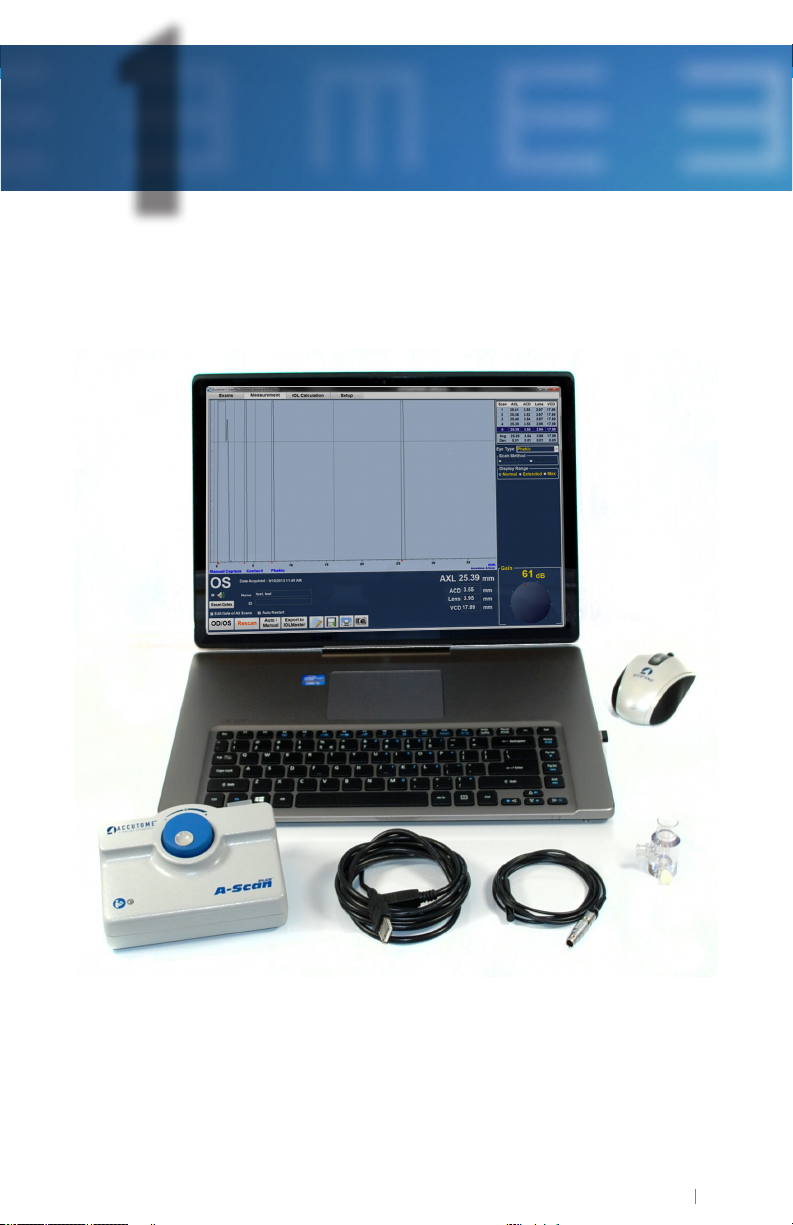
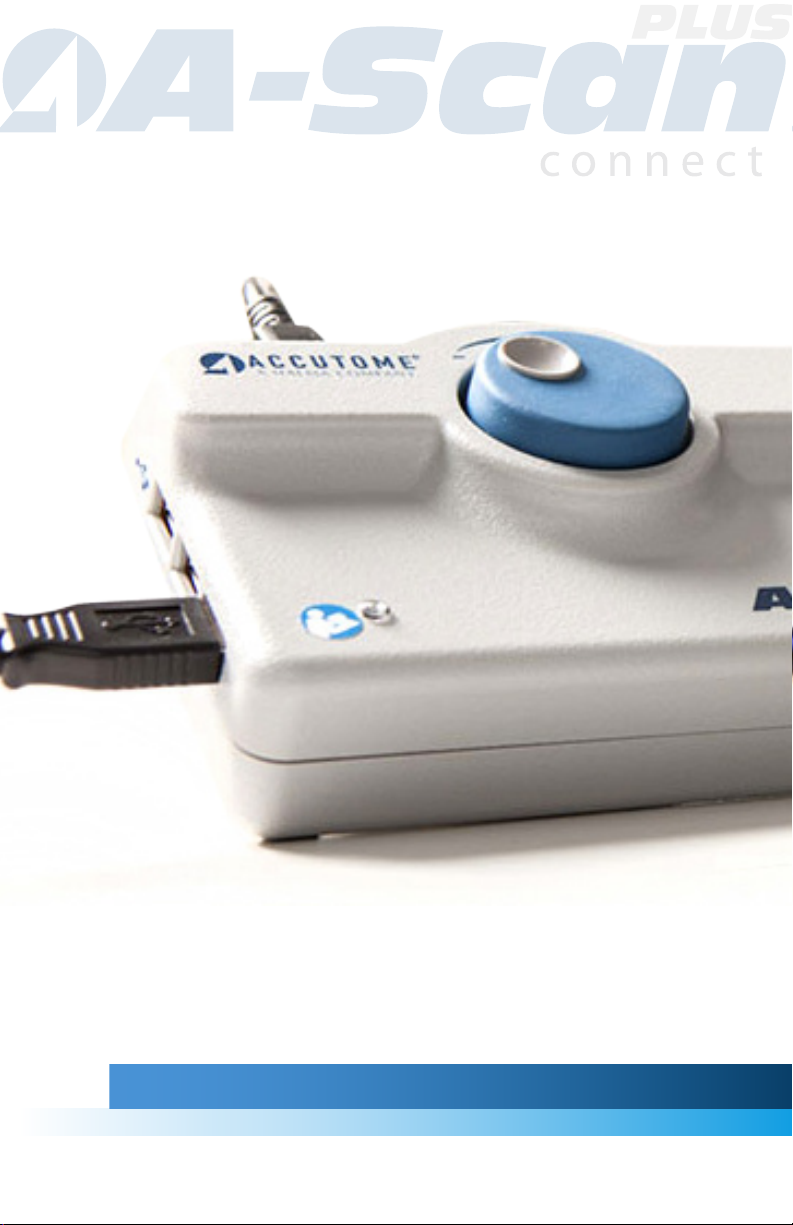
The Accutome A-Scan Plus Connect pictured below has all the features that make it easy to obtain scans with extreme accuracy and improved patient outcomes.
Figure 1.1 - Accutome A-Scan Plus Connect (800) 979.2020 US & CA • (610) 889.0200 International • +31 (0) 485.350300 Europe • www.accutome.com
The Accutome A-scan Plus Connect is designed for easy access to all screens and functions. The windows based software and proprietary universal interface provides unsurpassed ease of use and the straightforward Graphical User Interface guides you through every operation. What you can’t see on the surface is also important. Industry-leading signal acquisition and processing helps you assure accurate measurements. Reliable design and efcient manufacturing provide scal value. Upgradable software protects your investment. The A-Scan provides the following general features:
• Use on any Windows based computer • Universal interface and probe • Easily updated software • Provides a variety of printouts Measurements The accuracy of the Accutome A-Scan Plus Connect measurement is provided by the following: • High-resolution, real-time waveform display • High-speed digitalization acquires over 4000 points per waveform • Continuous display of Axial Length, ACD, Lens Thickness, and Vitreous dimensions • Audible feedback of contact and capture • Immersion mode yields improved accuracy - Contact mode also supported • Automatically or Manually capture up to 5 waveforms for each eye • Adjustable Gain, Velocities, Gates, and Amplitude Thresholds • Modify all waveform parameters using real-time or frozen waveforms• Predened Eye Types and Velocities handle most situations such as phakic, dense cataract, three types of pseudo-phakic, aphakic, silicone oil lled, and even phakic ICL eyes. All velocities are fully adjustable
• Custom Eye Types and Material Velocities can be created to handle individual preferences, special pathologies, or future trends
• Highly sensitive 10MHz composite Broadband probe features a xation light and multiple mounting options
IOL Calculations The Accutome A-Scan Plus Connect is also a leader in IOL Calculations and provides the following: • Modern formulas including Hoffer Q, Holladay, SRK/T, and Haigis • Compare results of all formulas simultaneously on a single screen for selected lenses• Instantly calculates emmetropic and targeted ametropoic IOL powers for dozens of lenses, viewed four at a time, using the average of selected waveforms, a single waveform, or manually entered data
• Conveniently group lenses by favorite designation such as surgeon, user, www.accutome.com • (800) 979.2020 US & CA • (610) 889.0200 International • +31 (0) 485.350300 Europe
• Personalization of IOL Constants is easy and straightforward, encouraging improved patient outcomes
• Maintains individual IOL Constants for each formula. Clearly identies which IOL constant is used with the selected formula